Skip to content
Sammie Kim

AutoText Manager Redesign

Redesigning a core reporting tool in PowerScribe One to restore efficiency, accessibility, and trust for radiologists.

Role
Product Designer
Duration
Jan–Jun 2024
Team
UXR, Eng, PM, Customer Success
Focus
End-to-end interaction design, systems-thinking, accessibility

01 — Problem

Managing reusable reporting content is overly complex

Today radiologists use AutoText to quickly insert reusable phrases and structured templates into reports, helping them report more consistently and efficiently. However, creating and maintaining AutoText content in PowerScribe One involved complex search, filtering, and nesting behaviors, making large AutoText libraries difficult to manage.
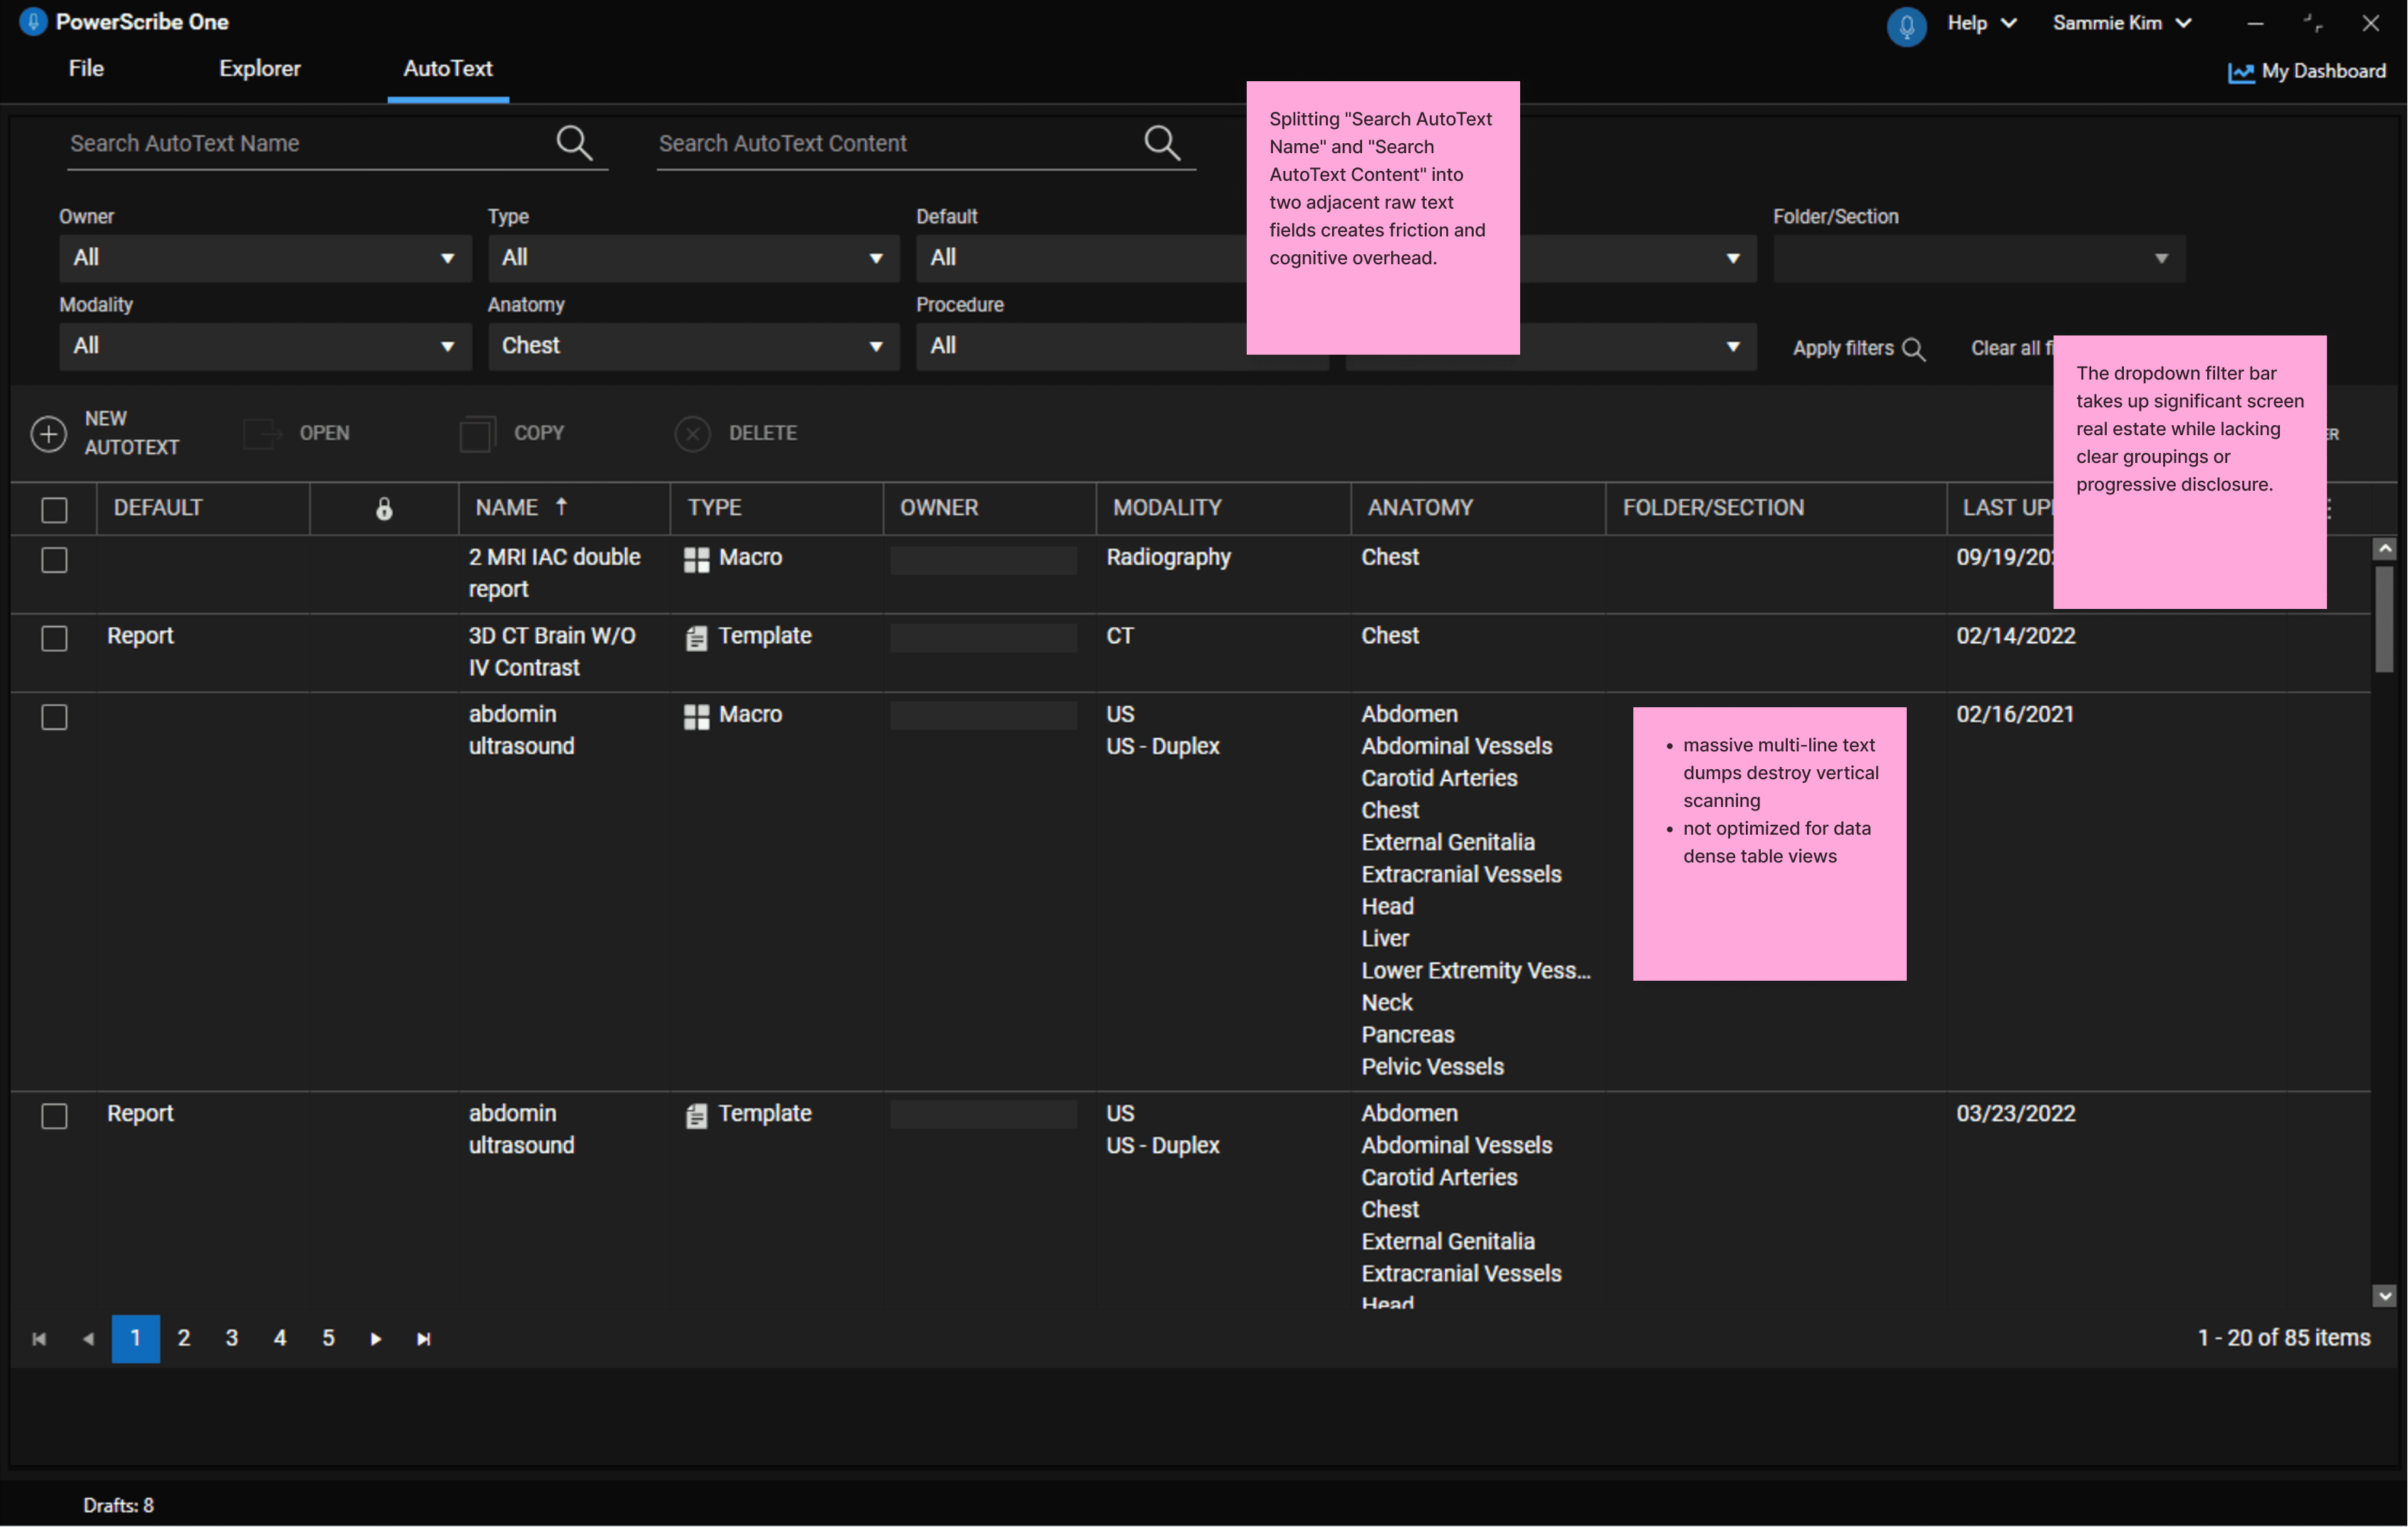
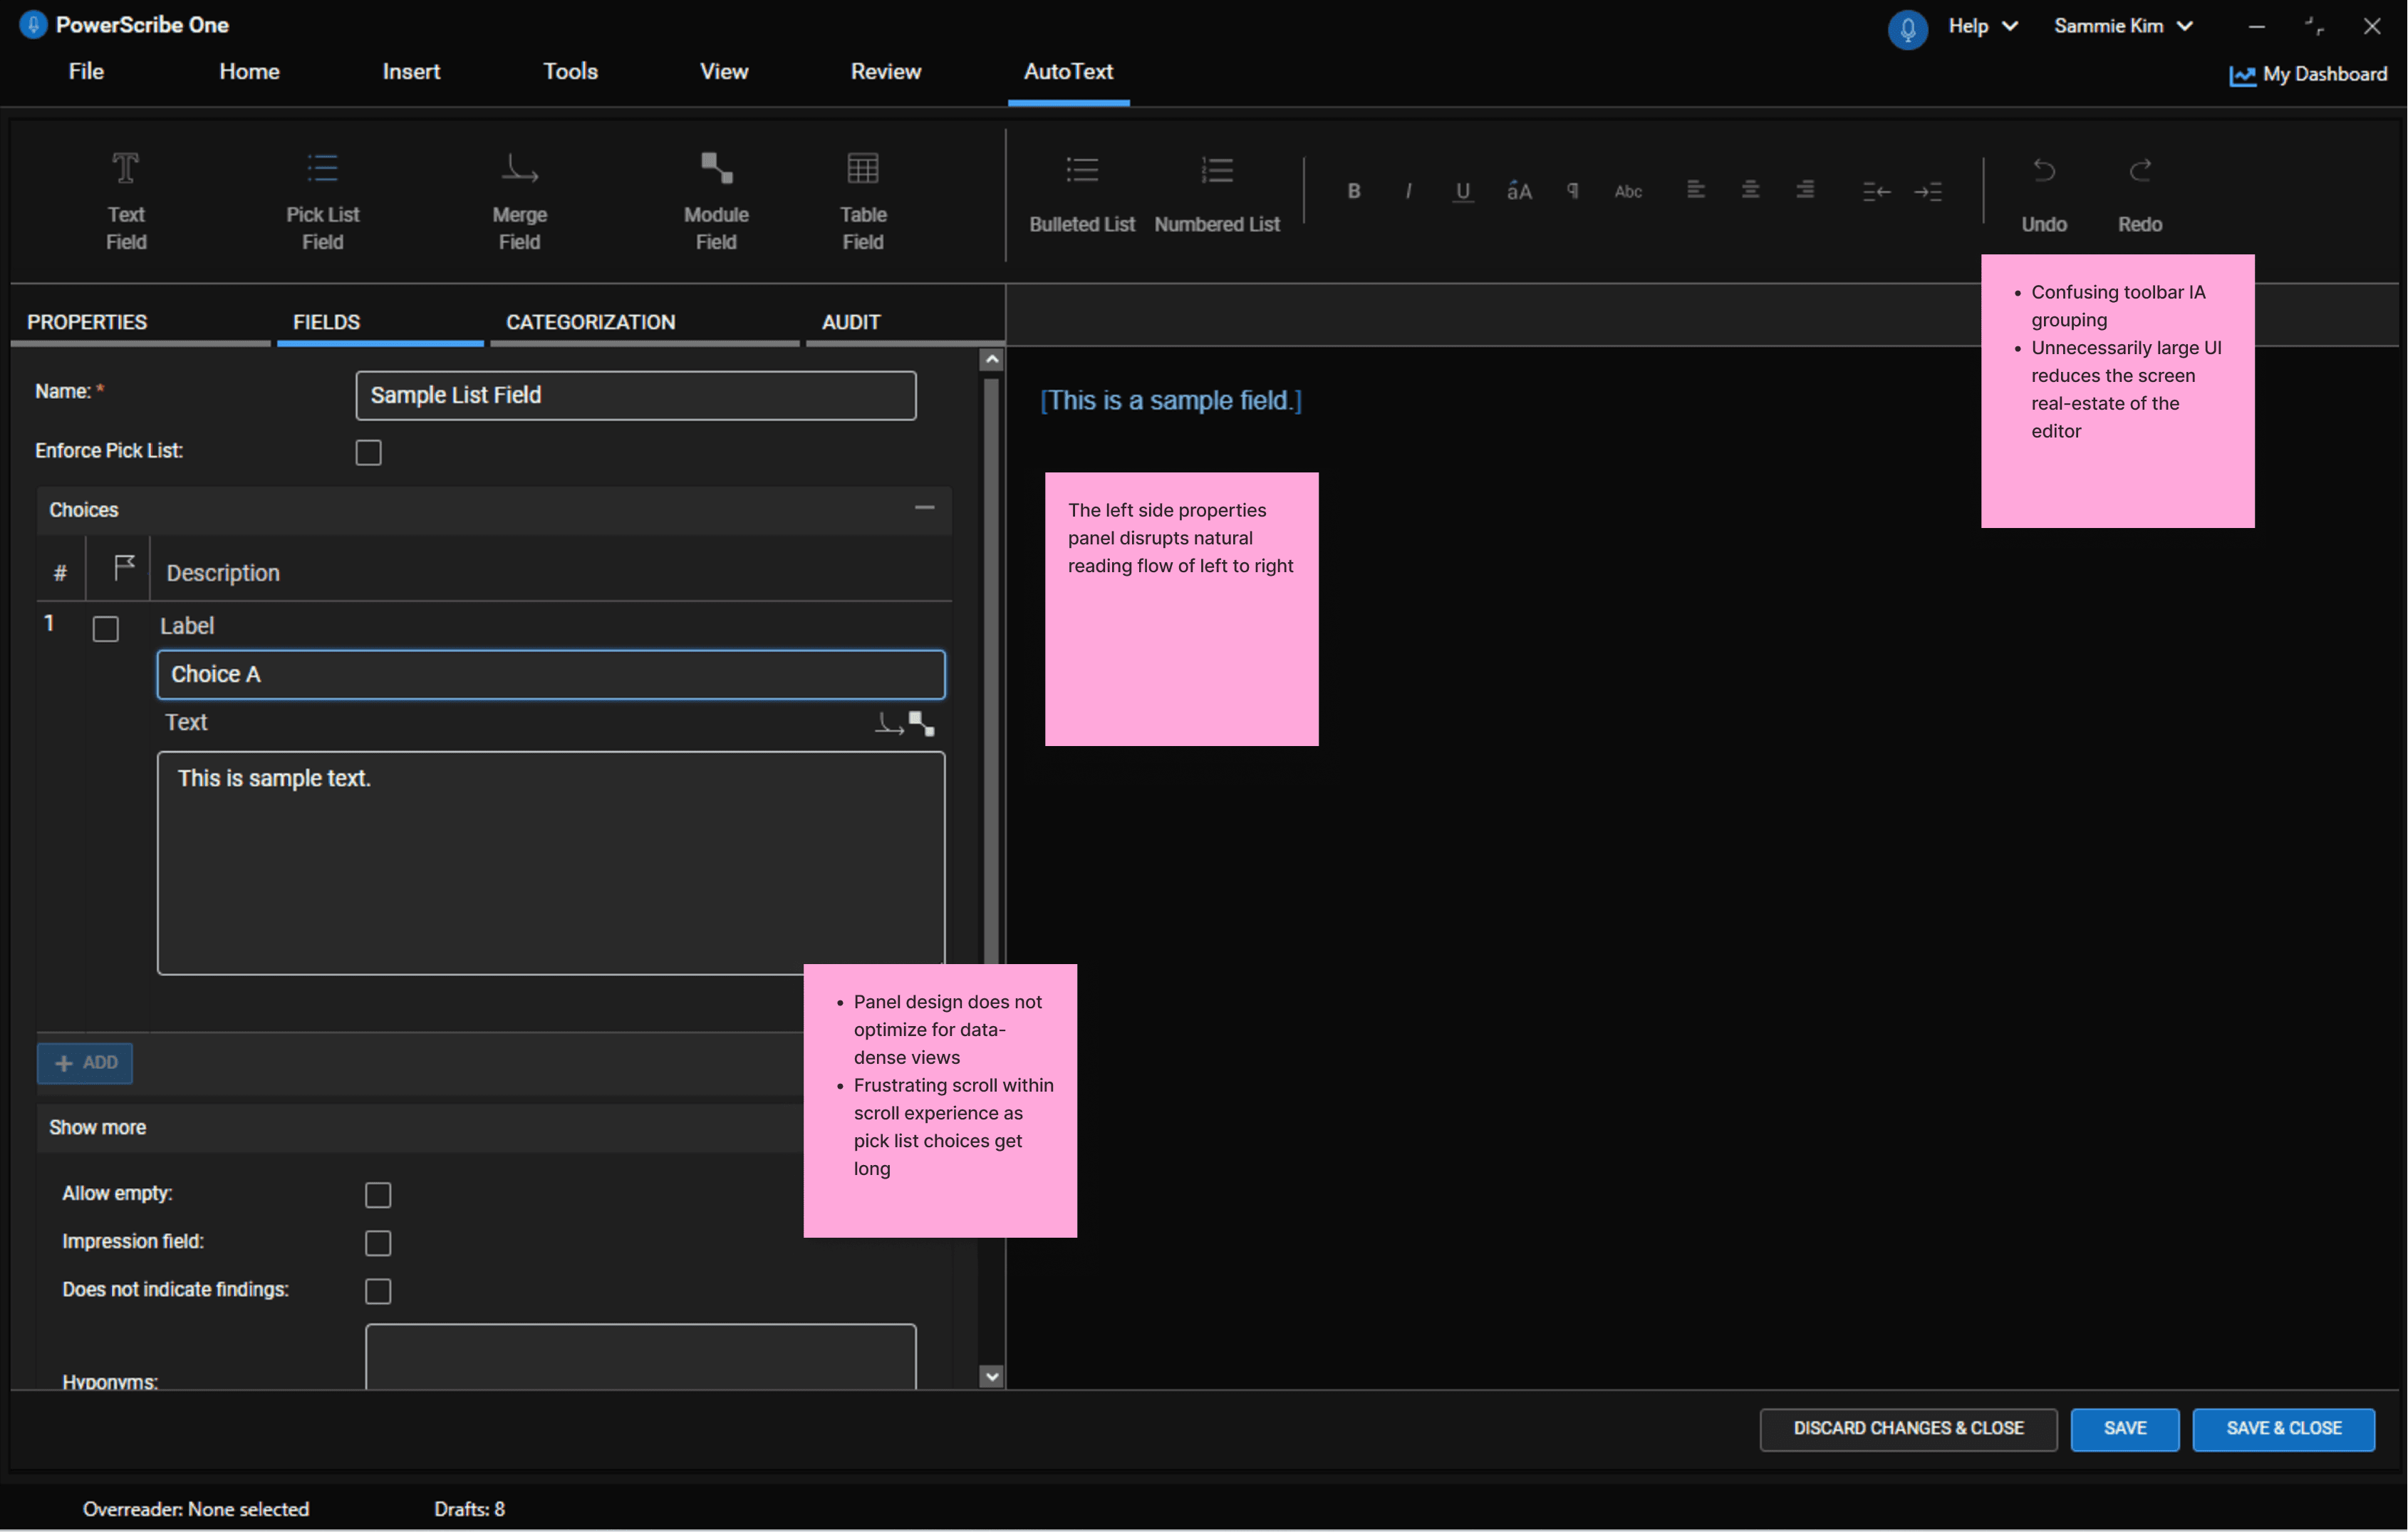
Existing AutoText library with annotations. Pain points: splitting name and content search into two adjacent raw text fields creates friction and cognitive overhead; the dropdown filter bar takes up significant screen space without clear groupings or progressive disclosure; and multi-line text dumps in the table destroy vertical scanning and aren't optimized for data-dense views.

The existing AutoText Manager, annotated with the pain points we found across the library and the editor.

1 of 2

  • Unintuitive creation

    Juggling content, fields, and settings at once.

  • Inefficient editing

    Routine edits took too many fragmented steps.

  • Cumbersome management

    Search and filtering got harder as libraries grew.

02 — System analysis

A deeply nested system

Behind every AutoText is a layered structure. Templates can nest macros and modules, macros can nest modules, and each is built from text fields, merge fields, and pick lists. We mapped this structure, and every step of creating and categorizing AutoText, to see where the complexity came from.
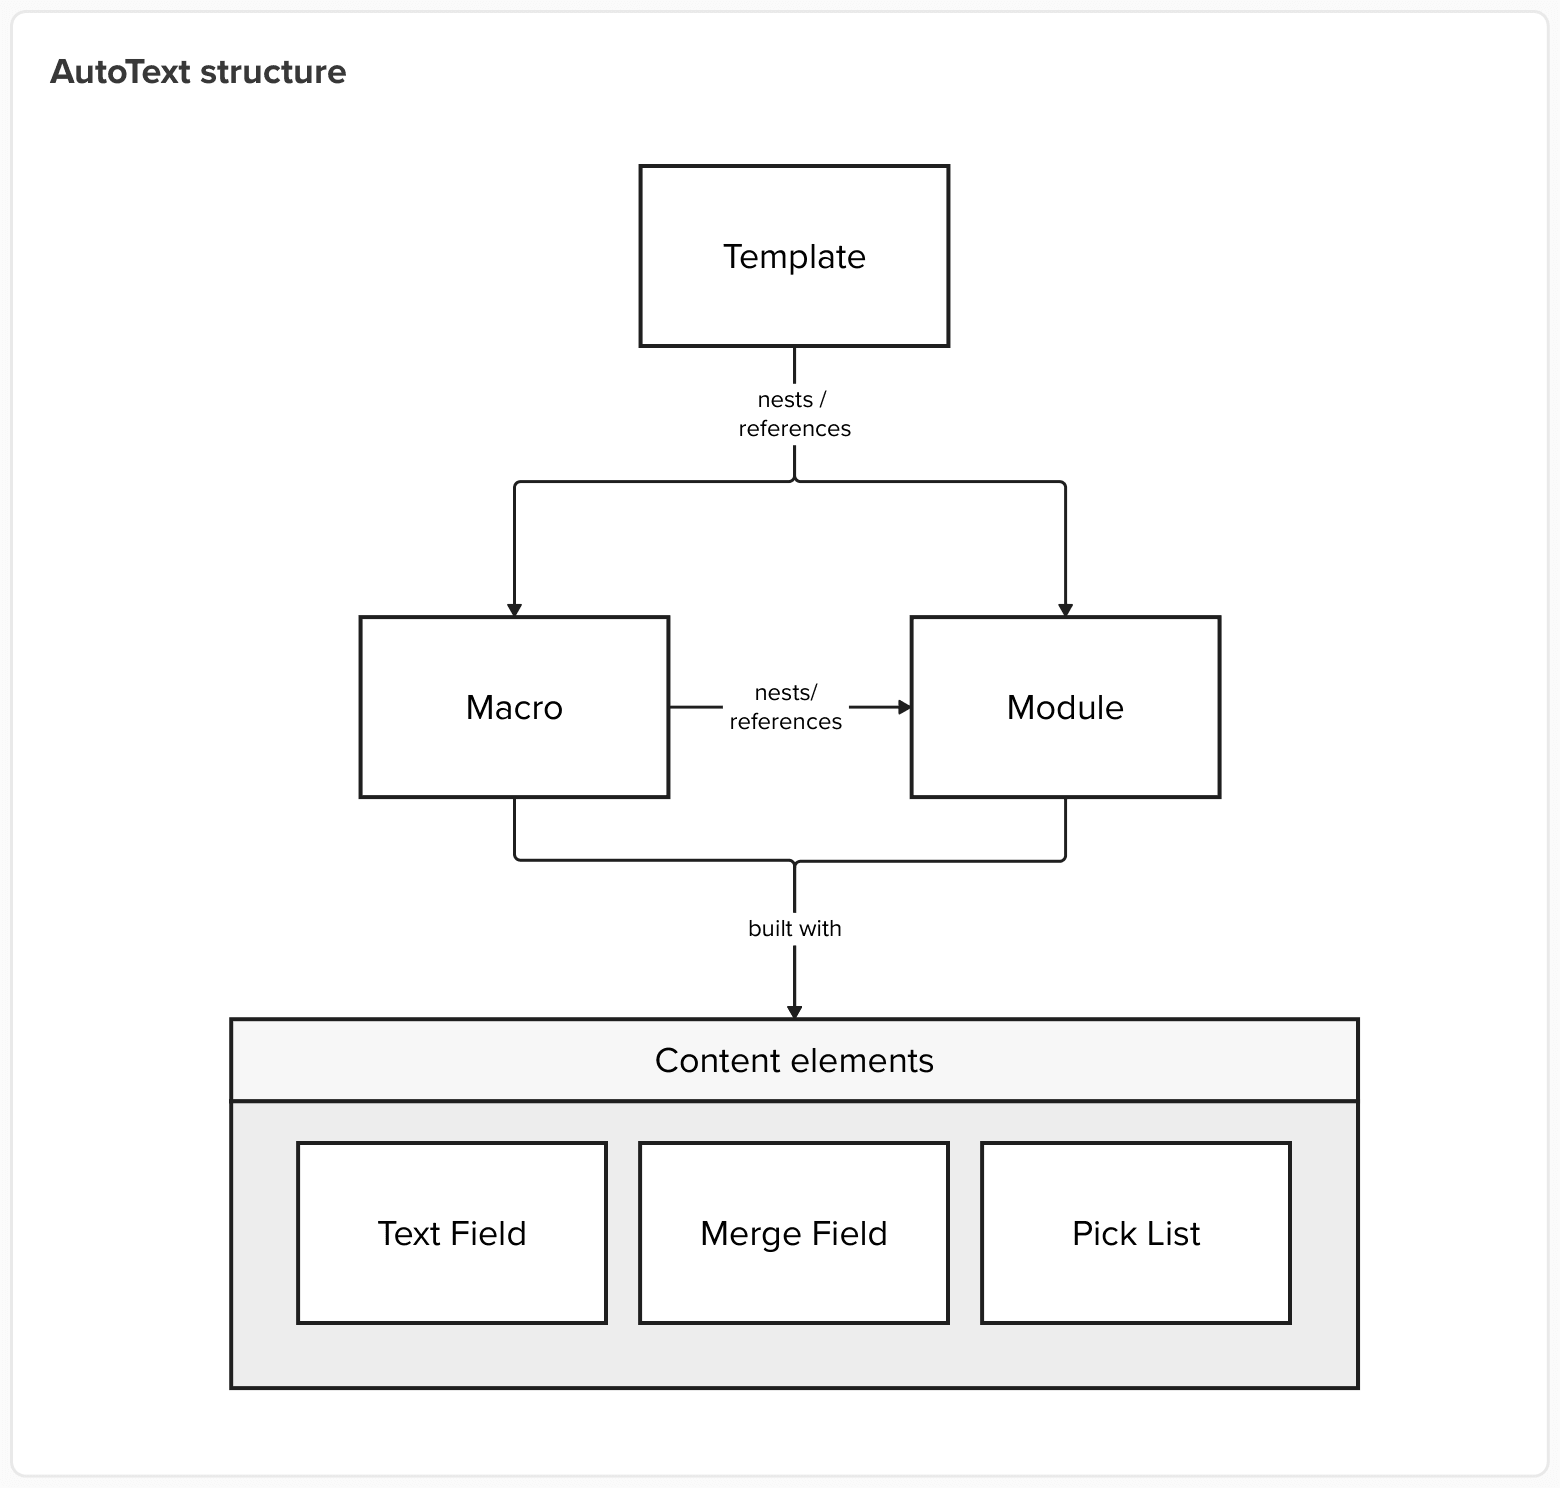

AutoText structure. A template nests or references macros and modules, and a macro can also nest or reference modules. Macros and modules are built with content elements: text fields, merge fields and pick lists.
The AutoText model: three types that nest within one another, built from shared content elements.
A decision tree of the AutoText workflow in two phases. Creating AutoText: 1, create AutoText; 2, basic info (owner, title, description, type of template, macro or module, and whether it defaults to a report or addendum); 3, add content, by inserting fields (simple fields and pick list choices, whose default content can nest merge fields, module fields and manual text, and merge fields of general or custom types), modules, tables (columns and rows) and macros. Post-creation: 4, categorization by procedure code (site, modality, anatomy), patient class, gender, age range, privacy and folders.
Our analysis of the steps to create AutoText: its properties, the fields, modules, tables and macros that can be inserted, and categorizing it by procedure code.

03 — Solution

A streamlined end-to-end management experience

Shipped in 2023.1 SP3

The redesign simplifies the full AutoText workflow, from creating and organizing content to searching, filtering, and managing it over time. Built with Microsoft Fluent 2, the experience introduces clearer interactions and a more scalable foundation for managing reusable reporting content, while improving accessibility and efficiency for radiologists.
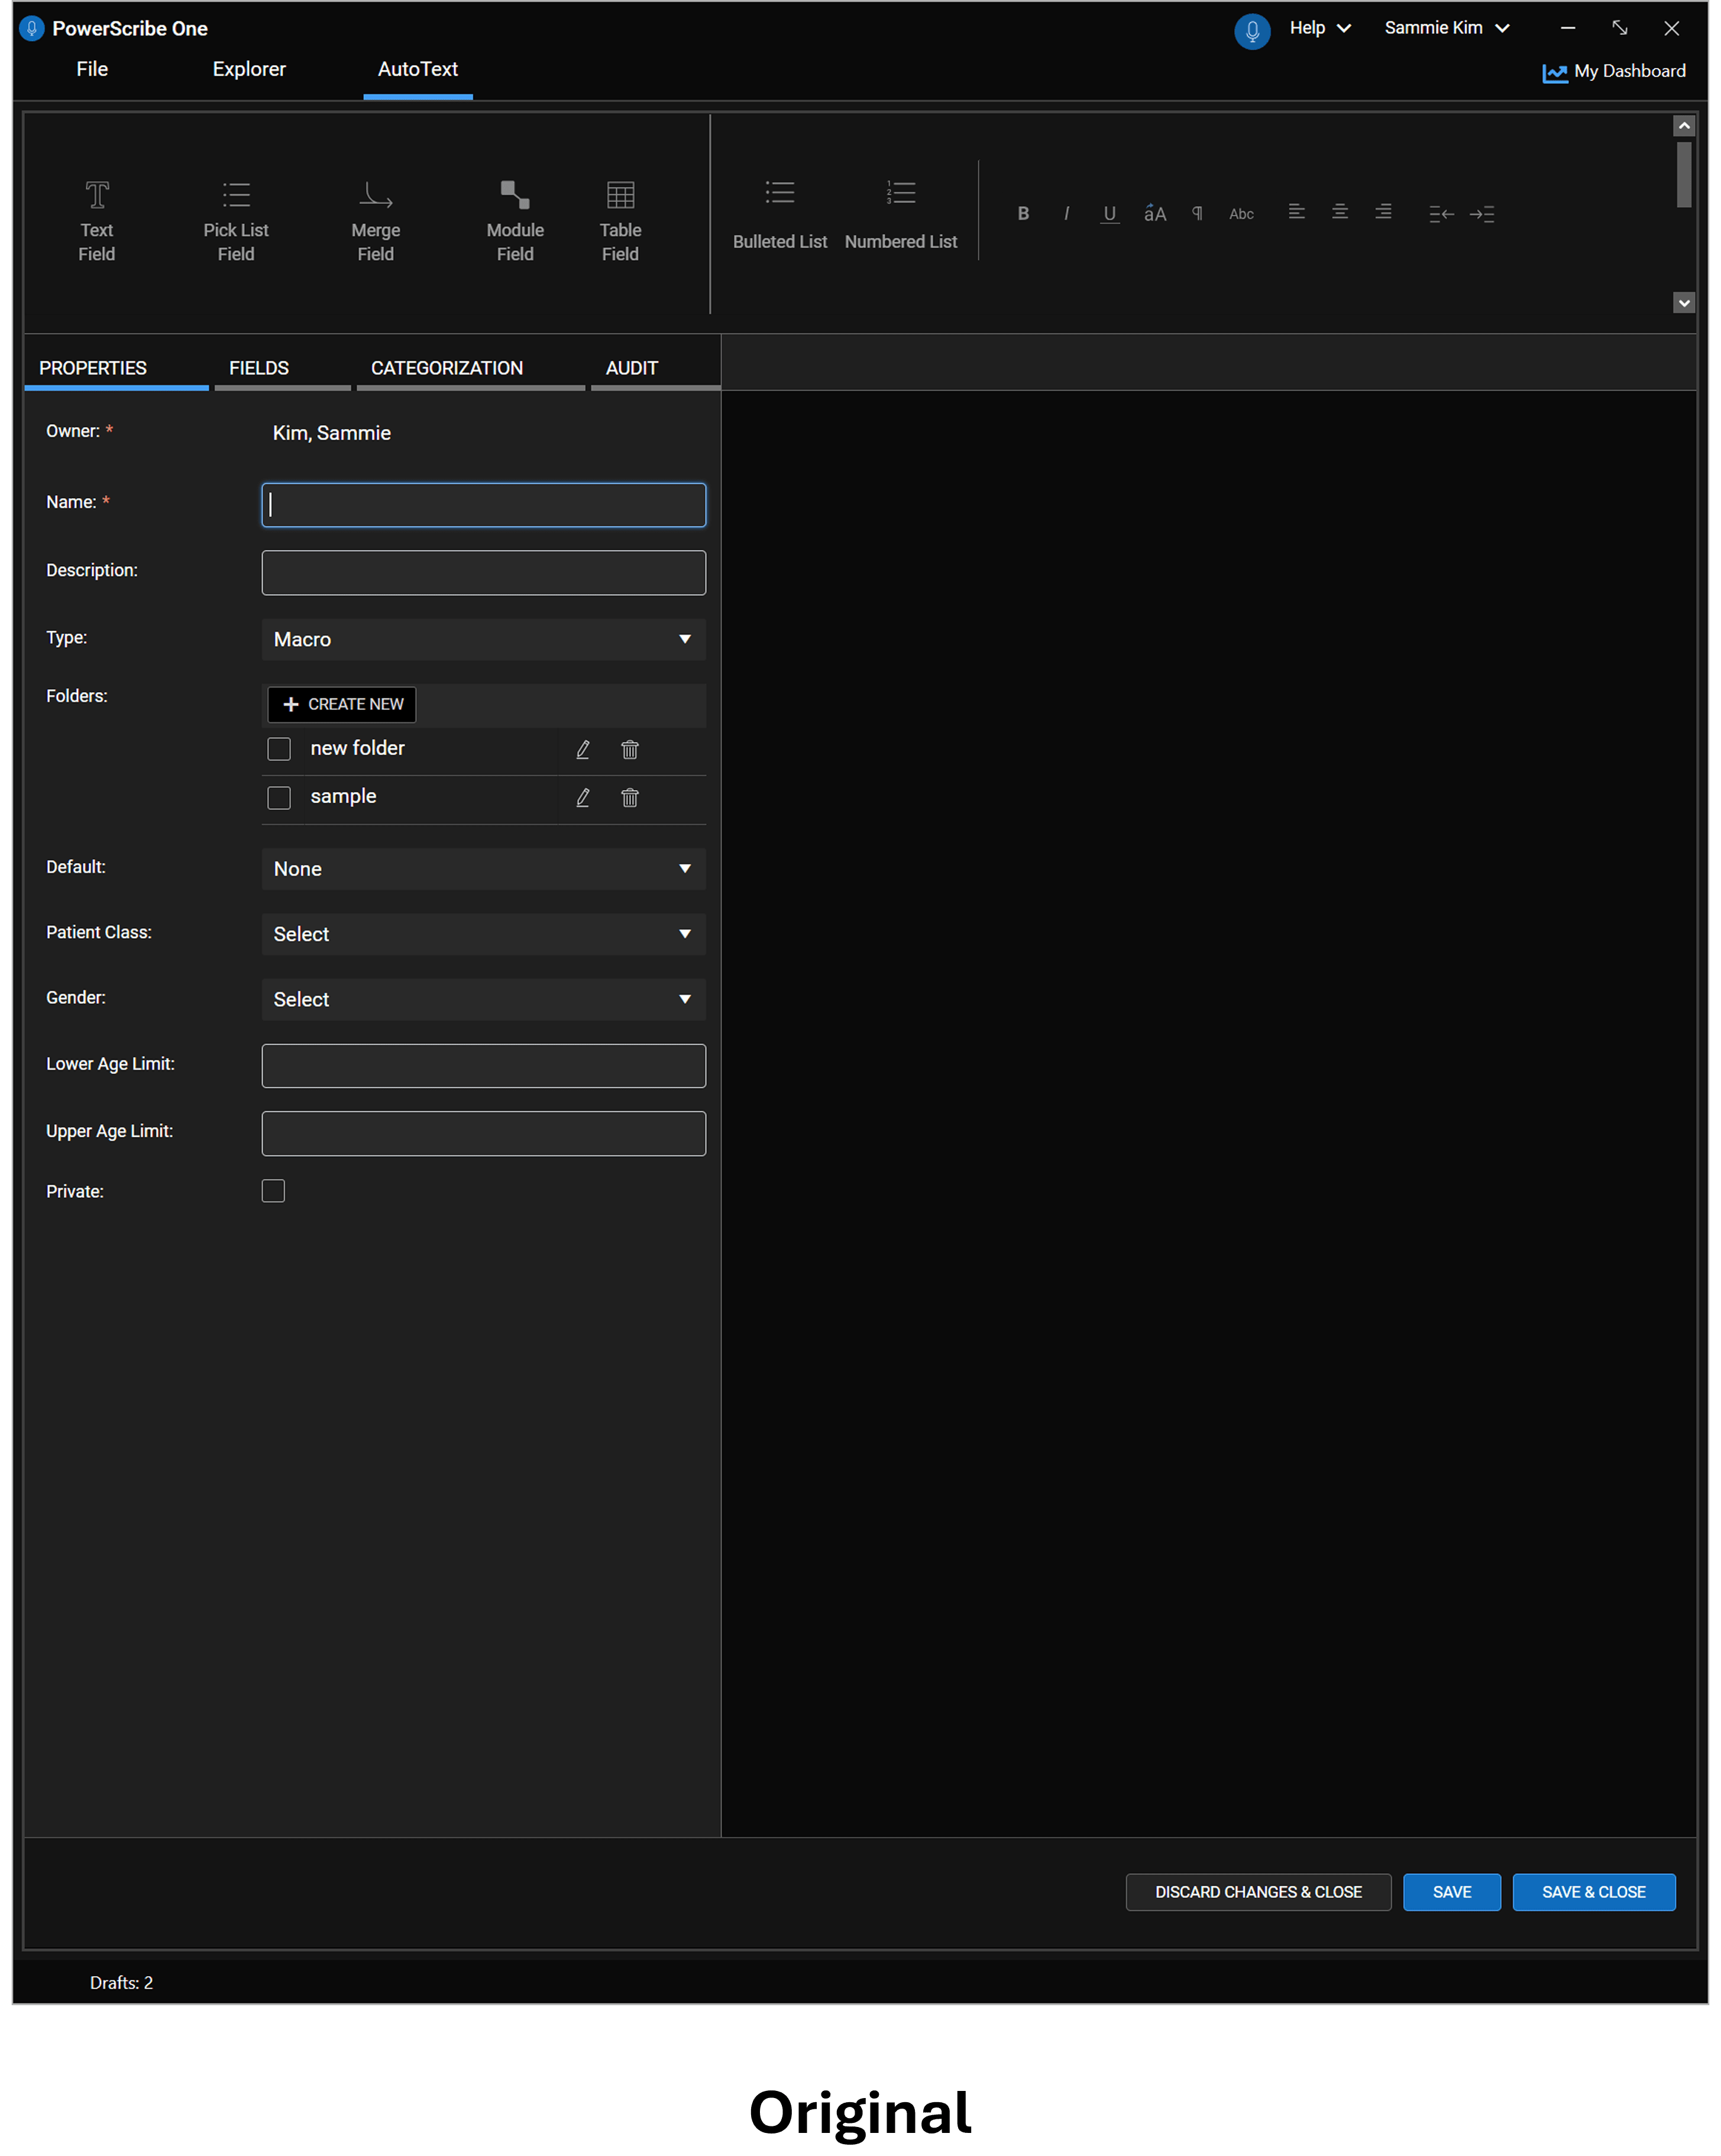
  • Original AutoText editor: a toolbar of field buttons above Properties, Fields, Categorization and Audit tabs, and a long form of owner, name, description, type, folders, default, patient class, gender, age limits and private, with Discard Changes & Close, Save and Save & Close buttons at the bottom.
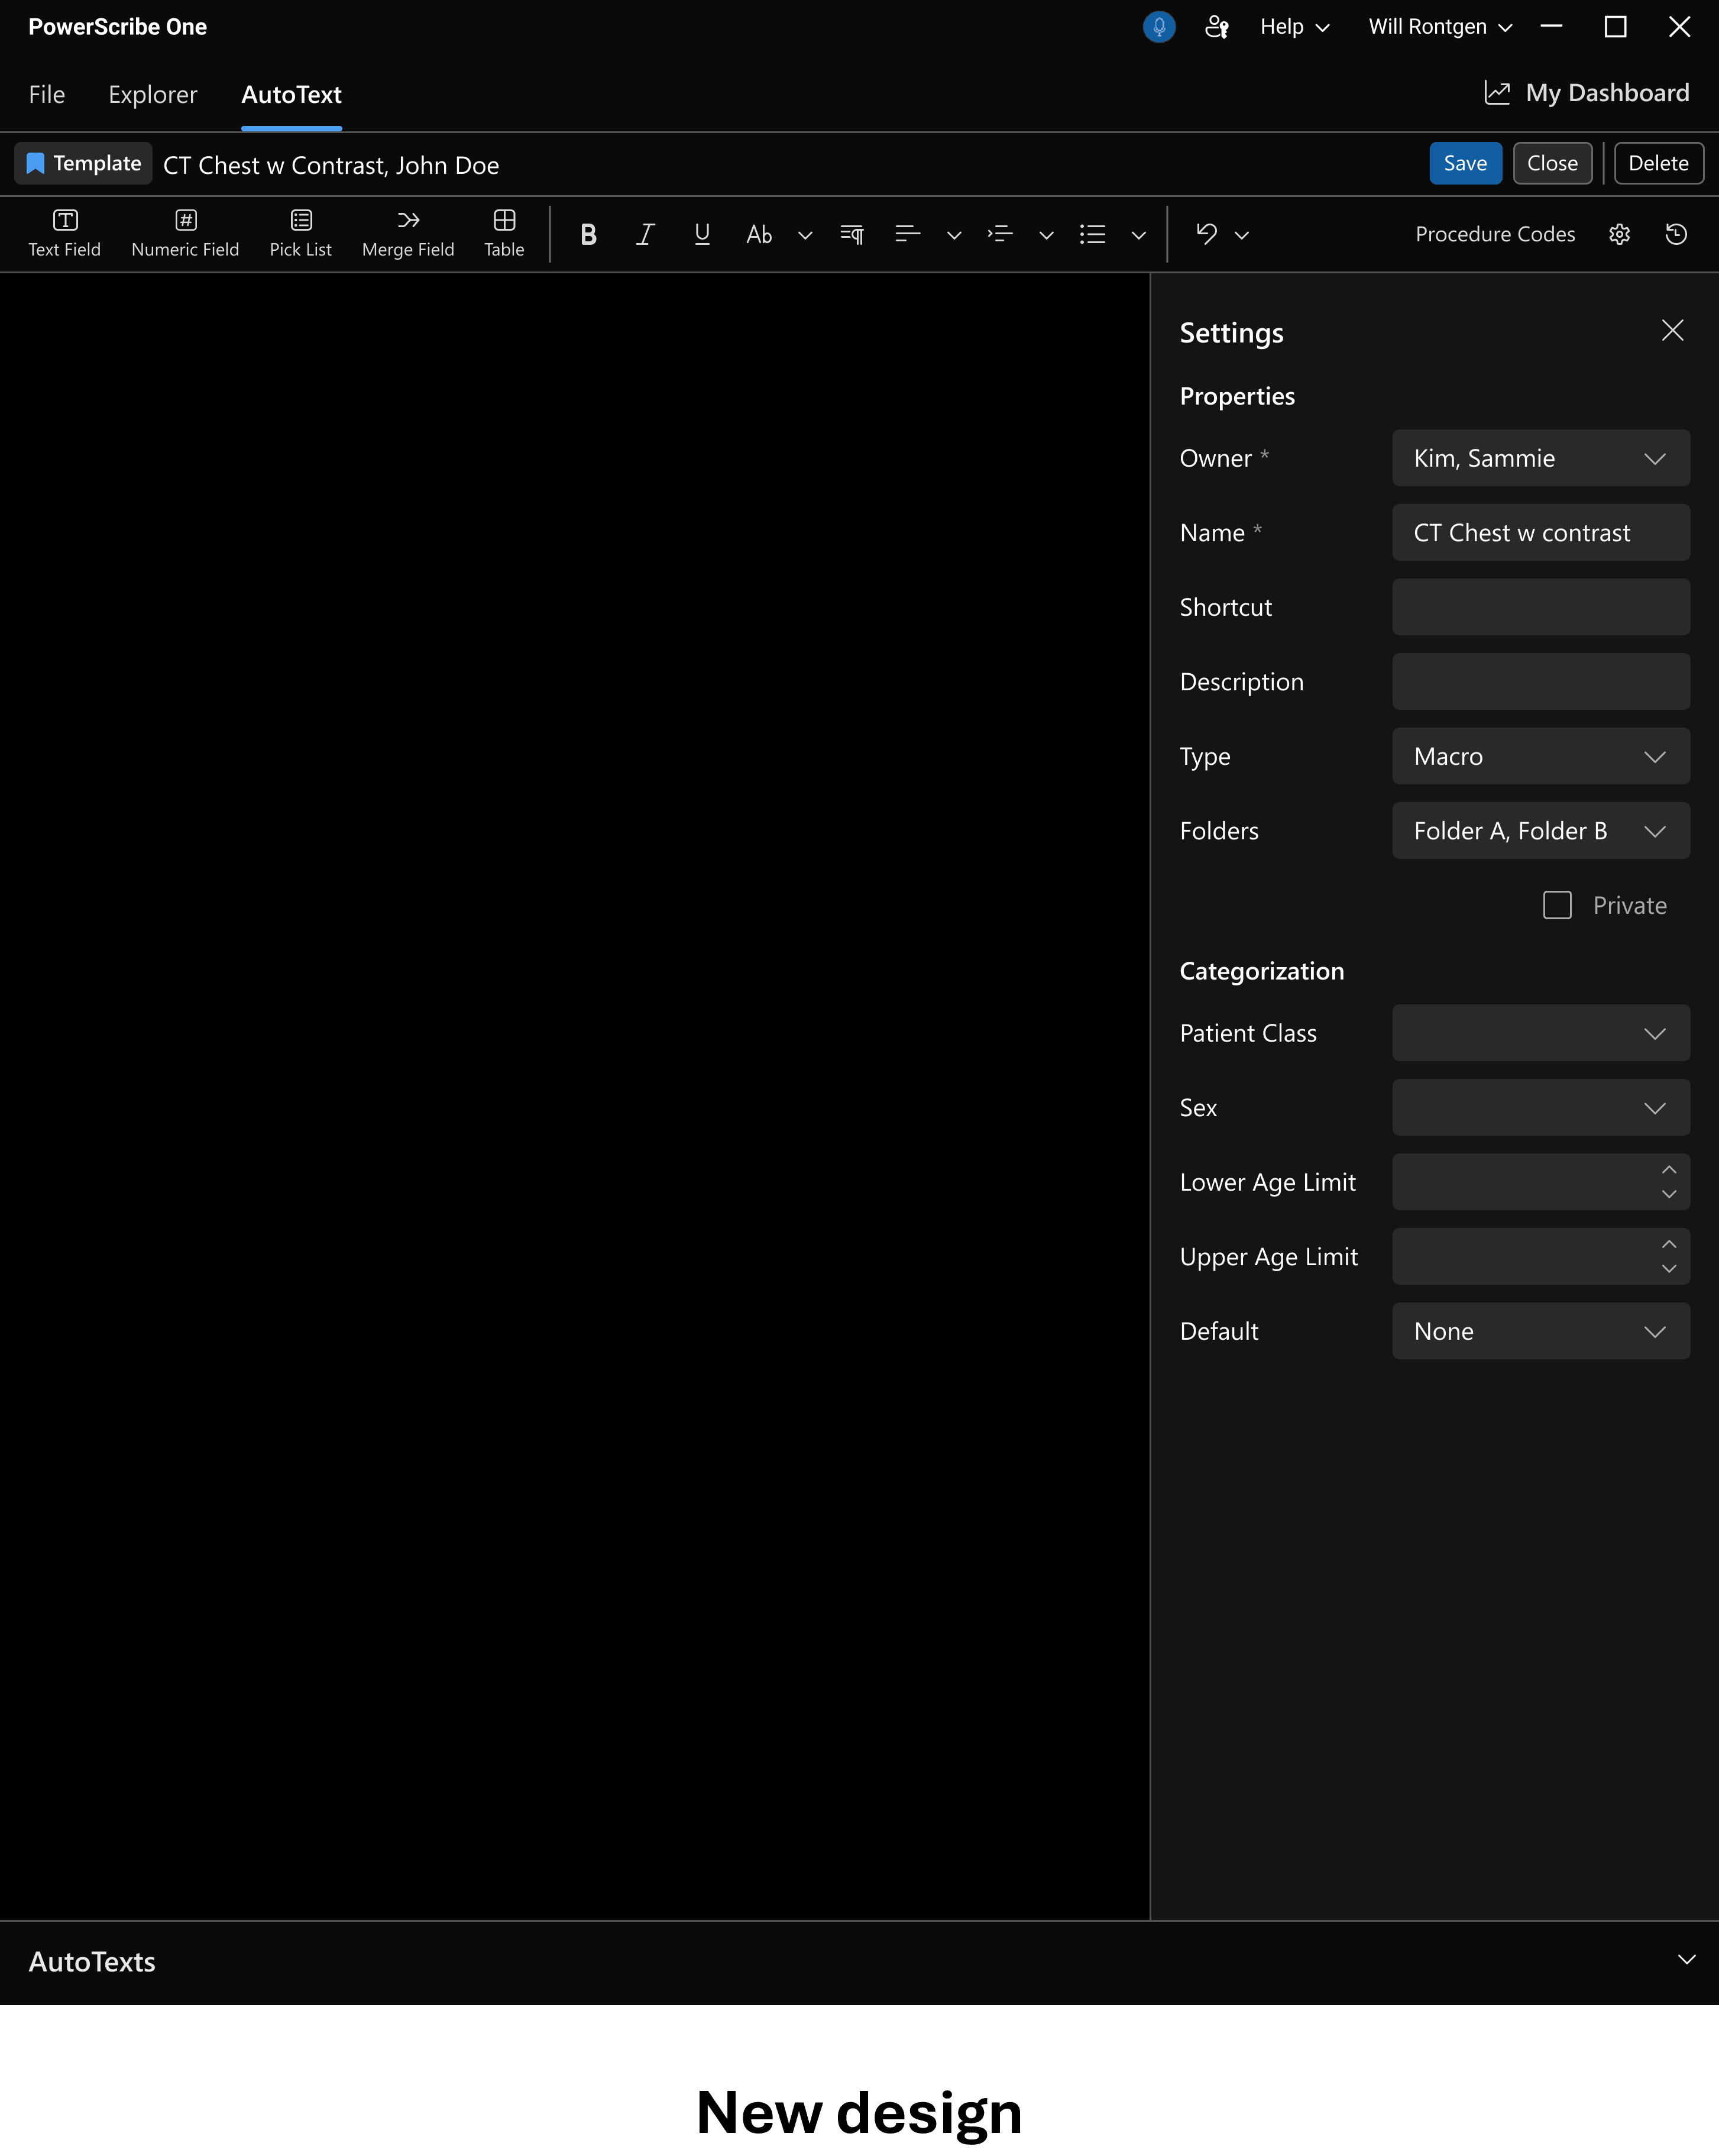
  • Redesigned AutoText editor: the template name with Save, Close and Delete in the header, a compact formatting toolbar, and a Settings panel beside the report grouping Properties (owner, name, shortcut, description, type, folders, private) and Categorization (patient class, sex, age limits, default), with the AutoTexts library collapsed below.
From the original tabbed form to the redesign, where properties and categorization sit together in one Settings panel beside the editor.
Search the library and open an AutoText straight into the editor, a seamless transition from finding content to editing it.
Find an AutoText in the library, preview it, and nest it into the report you’re editing.
Insert a text field, give it a label, and set its default text from a panel beside the report.
Switch between pick list choices and see the report text update to match.

Full case study, including design decisions and process, available on request. sammiekim1227@gmail.com